Well it's not the most exciting topic, but it's an important one to talk about.... duhn, duhn, duhn - GRADING! Grading all the awesome writing your students complete can be SO overwhelming! I hope today's writing topic can help you feel a little better about grading personal narratives.
Grading for me has always been most beneficial when students are a part of the process. I use data charts with my students so they can track their own knowledge on all kinds of subjects of learning in our classroom. It helps them set their own goals as learners and to see what they need to improve upon.
There are many different ways to have students assess themselves as writers and rubrics are one of the easiest ways for them to self assess their writing.
Here are some of my kid friendly rubrics for you to use with personal narratives.
Using a personal rubric allows students to see immediately what they need to add and edit to their writing before they can publish it. This self-reflection also helps students know what goals they can set to help them grow in their writing. There are a lot of ways to set up a goals chart for writing. If you do a search online you'll find so many different kinds that can meet your needs. I personally love using post it notes for students to add their names to and move as needed. Just remember that your goals for writing will change throughout the school year. At the beginning of K you may want "Spaces Between Words" as a goal, but by the end of the year that might not be goal that you need to keep as an option for your students.
We also need to assess student writing, so I created these teacher rubrics for easy grading with personal narratives. Click on the image to grab them.
If you want to create your own, click here for an editable version.
Another great tip for grading writing is to have other important people in your students' lives grade for you. I have had it timed out that parent conferences have occurred around the time I plan to grade writing. It is really helpful for parents to sit with you and get their feedback about the writing growth and the writing needs of their child.
You can also have a buddy class help grade and talk through the rubric with the student from your class the buddy student is assigned to. Older elementary students LOVE to help the younger ones and this is a perfect activity to complete together. Also, having students read their own writing out loud to their writing partner is an excellent method of self-assessment. I often say, "You're the author of your own story. If you can't read it, then other people can't read it." This is important for students to make sure their writing is neat, but also that words aren't left out or that invented spelling is readable to the author. I often have students start the Writing and Conferences portion of Writer's Workshop by reading their story first to their writing partner(s). I even model, model, model why this is important during mini lessons.
Tomorrow is all about independent writing choices in centers/Daily 5!
Welcome to day 3 of Writing Week 2020! I hope you're enjoying a peek into how I teach writing in the primary grades. Today is all about strategies for improving writing with emergent writers. One of the amazing parts of writer's workshop is that it's naturally differentiated, but that's also one of the scariest parts of writers workshop. Having an equipped and full toolbelt of strategies for helping your young authors is necessary for their individual needs. I wear my toolbelt during writer's workshop Writing and Conferences time as I travel around the classroom.
I keep many tools inside of it to help my writers as I see what each one needs to become a stronger writer.
Let's take a look at some tools (and toys) I use to help stretch all the writers in my classroom.
Play-Doh is a perfect tool to use when introducing how to start a new story. Have students open their Play-Doh and observe what they see. You will get answers describing one color, a "blob shape", or my favorite - "It looks like Play-Doh." Then show a blank piece of paper and tell students that writing a story is just like playing with Play-Doh. It starts out as just a white, rectangular shaped piece of paper, but when we add our thinking and creativity to it we can turn it into something. Then allow students to turn their Play-Doh into something. I like to have my students use Seesaw to take a photo of their Play-Doh creation and record what they made as a reference later in writers workshop for each student to reflect and remember authors start with nothing and turn it into something, just like we did with the Play-Doh. This is a great tool to use to help timid writers just start writing. Always remember that in kindergarten and first grade, writing can start with pictures. If you have an apprehensive writer in the beginning, let them start with pictures, then move into labeling, then words. (Click the photo to grab my 3 Ways to Write FREEBIE.)
Isn't it awesome that writing is naturally differentiated?!?! I also love these two books for mentor texts with helping apprehensive writers.
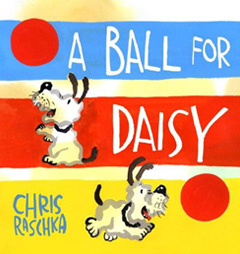
A Ball for Daisy is a wordless book, yet it tells a story about Daisy and her ball. It shows young writers that our pictures hold meaning, so starting with pictures is okay.
The Dot is a great book about making a mark that can turn into so many creative things, just like we do in writing. We just have to start!
One tool that I use as a visual model for my authors is this stacking toy. It helps writers see that they need to make sure their story is told in the correct order to help it make sense. I know that seems so simple for us, but for emergent writers they really do need to understand beginning, middle, and end. This is a skill we are working on during reading ALL THE TIME, but making it translate into writing can be hard at times. Using this visual helps tremendously. For writers who are already skilled at making their story flow, this tool can be used during revising in the writing process. Sometimes we need to rearrange parts of our stories to help them make more sense to our readers. During revising you can see my class literally cutting their stories apart and rearranging them to make them clearer, just like with this toy, we can rearrange it to make it "right".
Mr. Potato Head is a wonderful visual for showing why details are important in writing. Start with the body of Mr. Potato Head and ask students what it is. They will probably know it's a Mr. Potato Head. Ask students to describe Mr. Potato Head and they won't have much to say apart from brown and oval shaped. Start adding pieces one by one, having students describe what they see. As you add each part, Mr. Potato Head becomes more interesting. These pieces are like the details we add in our writing. Details help make stories more interesting and fun to read. Here's an anchor chart I made to help my students remember all the details writers can add to make their stories better.
I keep Mr. Potato Head near writing area to remind my students to add those details during writing and, of course, I wear my costume on the day I introduce him.
Thank you, Target, for your fun costumes!
Let's Go Fishing is a fun toy to use to help students understand adding hooks into their writing. Hooks are great details that engage a reader immediately. I have enough sets of these for students to play in groups of 4. After playing for about ten minutes, we regroup for writers workshop and I ask students how they caught the fish. They know they used a fishing pole. Then we talk about how fishing poles have a hook to catch a fish. You can't catch a fish without one. I then explain that authors use hooks, too, to catch their reader's attention. Some hooks we can use in writing are asking questions or starting with an exclamation.
Legos or Unifix cubes can be used to help writers visually see the we need a beginning (green), a long, detailed middle (several yellow blocks depending on the level of your writer), and an ending (red). Helping young authors see that most of the story is included in the middle is important for remembering to add details and stretch it out. We call this elaborating. I also use this song to the tune of "Tell Me More" from Grease:
Tell me more, tell me more
I don't think I can wait.
Tell me more, tell me more
Will you elaborate?
Uh-huh, uh-huh,
Let's elaborate
Uh-huh, uh-huh,
Let's elaborate
Many of these ideas can be added to your student's Writer's Tool Boxes in miniature form. I found many mini versions on Amazon, but just having visual cards helps too. Click the image below to grab the cards. You can keep them in your toolbox or put them on a ring and add them to student's boxes.
What else is in my toolbelt? Let's take a look!
This 7 minute video explains everything I carry around with me for writing conferences.
I hope these strategies help make writing more fun and engaging for your students and YOU!
Also, this book is amazing for strategies for all ages.
Publishing parties are one of my favorite days in the school year. They are a true celebration of all of the hard work your young authors put into their writing.
I created this freebie for you to celebrate your writers' hard work. Click the image to grab it and to learn more about publishing parties:
Here's a little bit of what's included in this FREEBIE:
I hope your authors and YOU enjoy publishing parties in the future!
Tomorrow is all about strategies for improving writing!
Welcome to Writing Week 2020! This week is all about helping you learn some tips and tricks about writing so you can help your students. Just a few things about this week...
1. I love sharing what I have learned throughout my 16 years in primary grades, but I am always learning, too. I don't have all the answers but I do have a passion to find the answers and always make each year of teaching better than the year before.
2. Each day's topic will be shared here on my blog whether you're following on Twitter, Instagram, or Facebook. I will post each day's link for you to access with one easy click.
3. Give yourself grace while you learn. You don't need to download everything immediately or get overwhelmed. Everything is accessible forever - from the posts to the freebies. Take a break and come back next week, or month, or year if you feel like it's too much to take in right now.
4. Email me with any questions, anytime: ericanroe@yahoo.com
With that being said...
Here's day 1!!!!! Yay Writing!!!
Today is all about getting started with Writer's Workshop in your primary classroom and there's a LOT to share so it's in 2 parts. Click below to watch each of the parts: Part One Part Two
Access all of the FREEBIES by clicking the pencil below and check this freebies link often as I'll be adding more to it throughout the school year:
I love, love, love to teach writing... now. I honestly hated it when I first started teaching kindergarten because my kids couldn't write anything and I didn't know where to start. The resources my campus had were made for Kindergarten through second grade. These materials helped me ZERO when I was planning writing for my littles who couldn't even write their names. This all made for a VERY frustrating 45 minute writing time each day for my class full of five year olds and for me. I felt like a failure and so did my kids.
So what changed?
First of all I went to my principal and explained my frustration and talked to the other Kindergarten teachers on my campus. I asked if I could stray form the curriculum and start smaller. Thankfully my principal agreed and my teammates were excited to ditch our curriculum and start again. This was around October of our school year. There was still time to fix things - phew!
There were many things that changed in our room to help us become successful writers. For one, we wrote all day long in a balanced literacy program, which included components of writing into our whole day - from playing word wall games and singing sight word songs for transitions to adding fun ways to write into our daily five choices. I will go more into our schedule and balanced literacy later. For our explicit writing time, we started with the three ways to write. This was an idea I borrowed from our daily five - three ways to read. (Click on the picture to get these labels for free.)
We simply started with completing an activity together. My class walked around the outside of the school and used our five senses to observe the world around us.
Then we went back to the classroom and wrote with pictures what we just did together. We just wrote with pictures. No labels. No words. No sentences. This gave me the chance to then see how well we could draw. For that whole week we completed an activity and I modeled how to write with pictures and then students went and did the same. Please note that we never used crayons, just pencils and paper. Each day when I modeled, I would clarify any drawing issues we had. I especially focused on characters and setting. In just one week we understood characters and setting and how to add these into our writing when we wrote with pictures. I also taught my littles to know what a small moment is. They were small moment experts at the end of the week and knew that our activities that we were writing about were a small moment from our whole day.
Then on week 2 we learned how to write with letters. On day one, I challenged my kiddos to think of a small moment from their lives - either at school or home. To help them think I gave them all Small Moments Catchers hats.
We first shared these small moments in a whole brain teaching method called Teach-Okay, then we went to write with pictures those small moments. At the end of independent writing, we learned about our writing folders and placed our stories on the green dot side, because we would add more to that story. I even showed them my big writing folder with dots inside as well.
On day two of this week, we pulled out our new writing folders and grabbed the small moment from the day before to learn our second way to write - write with letters. We call these letters "labels". Labels are when we get our mouth ready and say the first sound in the word, and then write it down. This went along with one of our reading strategies from guided reading groups.
I challenged my littles to add three labels to their stories. Of course all of this was modeled with my folder and writing first in front of all of the kiddos.
The next day (day three) we practiced more with labels by labeling the whole classroom with post it notes. I gave each student a small stack of post its and they just labeled everything they could based on the beginning sound. I also introduced this poster on this day using my students' pictures.
This anchor chart helped my littles to feel confident in writing the first sound of words and labeling.
Another labeling lesson we did was labeling the teacher. I used my high school helper for them to label with post it notes.
We also continued working on "writing with letters" in our writing of small moments this whole week.
For week 3, I introduced this anchor chart and told my students that we are already experts at writing.
I asked them to tell me which of these things we already know how to do. They loved that they knew how to think, draw, and label and they were ready to learn how to write with words. I modeled very slowly how to write a sentence, making a big deal about sight words that we knew and listening for sounds that we knew and celebrating those. (We work on sight words and phonics daily during our mini-lessons in between daily five/guided reading groups.) My littles felt so successful just in being able to tell me how to spell sight words and what sounds were coming out of my mouth. Some of them even commented that "If you can think it, you can say it. If you can say it, you can write it". Yay! Sprinkles to Kindergarten! The little light bulbs were coming on. Over the next few days we practiced the four steps of writing and started sharing our writing at share time. During our independent writing time, I would choose three students who were modeling a goal that I had set for the day in our mini-lesson and give them a share bear. These students would then share their writing under the document camera during share time.
Here is a little video of share time for one student from this year.
You can see the sharing that in sharing time we also know about Star Star Wish. This is just a kinder friendly method of checking for understanding and engagement with the other students and for the sharing student to get some feedback.
Can you believe this is three weeks of learning in writer's workshop? Just remember that we are writing and working on components of writing all day long. This is the number 1 key to writing success!
Over the next few weeks we have so many important mini-lessons including establish writing partners, starting writing conferences, getting differentiated paper, using writer's tool boxes, writing smiley sentences and setting goals. I will go over these parts of writer's workshop quickly for you.
Writing partners are when you assign two students to work together in independent writing time. I also give those partners a writing post (assigned area in the classroom). Make sure you're clear in your expectations for what writing partners do and whether or not you're okay students coming to your table or if you want them to stay with their writing partner. I prefer for them to not interrupt my writing conferences and use their writing partner for questions. When students are writing independently, I play classical music and I work with my conferencing students. To establish a conference day, I created this chart.
This chart reminds students of their writing conference day, as well as me. Ha ha! During writing conferences, I help students check their work, set goals, sound out phonemes in words, and decide if they're going to publish their work. Here is a video of one student at her writing conference. You can see her using the word wall at the beginning and then checking her work along the way.
Writer's tool boxes are little kits that writing partners share that have materials for them to be successful as writers. (Grab the labels in my store!)
There are pencils, alphabet charts, kiss stamps, space men and stretchy the word snakes. Kiss stamps are for us to kiss a period at the end of a sentence. Space men help us to put spaces between our words. Here is a video of on of my littles using the kiss stamp.
Stretchy the word snakes are little versions of this big guy.
It's a song by Jack Hartman that we dance to to help us learn and practice how to
stretch sounds. This is also one of our reading strategies from guided
reading groups.
Differentiated paper is paper that is different for all the students in the classroom. I place paper in these trays based on the writing needs of each student. They know their paper tray matches the colored dot next to their name. The color dots and paper styles should not stay the same all year. Change them as needed for your students.
Smiley sentences are sentences that have these components.
Three page stories are introduced when you start having students who are writing more and ready to tell their stories over multiple pages with a beginning, middle, and end. These stories go through editing and revising by making sure each sentence is a smiley sentence before it gets published. When we publish, I type the stories for students and then they get to use the publishing tools to illustrate them. They're just crayons, but my littles sure love getting to use them!
We also dedicate our published work with a dedication stamp.
Published work also gets a cover.
Published work goes into our classroom library for the rest of the school year in the "Student Authors" bucket. They all go home at the end of the school year.
This about sums up writing small moments for kinders and firsties. Now onto a few other things...
Sometimes you need to take a break from the routine of writer's workshop. My class loves to write non-fiction as well. Tree maps are so helpful with non-fiction writing. It's truly amazing to see students using the tree map without being asked to. They really do learn that tree maps can help them write.
Here is a published book about Martin Luther King Jr.
We had a rabbit visitor last Easter and wrote these rabbit pop-up books.
Toward the end of the year we do research projects about animals. I earned a ton of non-fiction books through Donors Choose. Students pick an animal from the book collection and create a diorama about their animals and write about their animal.
(You can get the materials for this research project by clicking the picture below.)
After Easter break, we wrote about what we enjoyed the most about Easter and created pop-up stories.
I also love to do a unit on letter writing around Valentine's day and let my little deliver their letters to people at school. We also write letters that we actually mail home.
We have even used Adobe Voice to create class books. Click here to see one.
Poetry is another fun unit to teach in the spring time. We write poems about insects and water color them and write books to our moms for Mother's Day.
I mentioned earlier about balanced literacy. I wrote a whole post about it here. Balanced literacy is incorporating writing and reading into your whole day. Take a look at my schedule. I highlighted each component of balanced literacy.
7:40 - Announcements 7:45 - Morning Meeting and Buzz Book (Morning Message) 8:15 - Guided Reading Group 1 and Daily Five
8:30 - Mini-lesson 1 (Phonics and Shared Reading)
8:45 - Guided Reading Group 2 and Daily Five
9:00 - Mini-lesson 3 (Sight word focus/word wall)
9:15 - Guided Reading Group 3 and Daily Five 9:30 - Recess 9:55 - Science
*Read Alouds and Notebooks are used frequently
10:15 - Guided Reading Group 4 and Daily Five 10:47 - Lunch 11:17 - Read Aloud
11:30 - Writer's Workshop 12:15 - Specials 1:00 - Math
*Read Alouds and Notebooks are used frequently 2:10 - Centers
*Reading with friends, word work, and independent writing are used daily 2:30 - Pack up 2:35 - Dismissal
You can see that almost our whole day is filled with literacy and writing. This is going to help your writers soar in their writing and reading.
One of the most important things I have learned in teaching kindergarten is that learning truly needs to take place all day, even in transitions. You also need to have a strong lesson on phonics daily and a lesson on sigh words daily. Please note that I said STRONG, not LONG. These are both great times to use your word wall. I state daily that "the word wall is there to help us learn".
For phonics, I focus on two to three letters a week for the first semester. We learn them through letter hunts, songs, and printing practice.
Letter Ff hunt while wearing a frog hat
Letter Mm hunt with a monster wand
Letter Pp tracing with a polar bear
Letter tracing with turtles
Letter Tt printing with spin the top
We only give a focused twenty minutes a day to them, but then use them all day in transitions, reading groups, and our morning meeting.
I have a letter unit for each letter that incorporates a letter hunt with a fun object to use or wear, a letter tracing activity, a letter printing game, and a bubble map.
These little units provide students with quick twenty minute lessons to master each letter and it's sound.
During the second semester, I focus on chunks. Chunky monkey is one of our reading and writing strategies. Some phonics chunks we focus on are -ing, -ar, -er, qu, ch, sh, th, -oo, beginning blends, and word families. There are so many fun things to do to practice these chunks!
We also do a quick twenty minute lesson each day on sight words. There are so many fun ways to teach sigh words.
I think the best resource for sight words in Heidi Songs. They're amazing and fun. Kiddos learn how to spell sight words so quickly because of her fun songs.
Here are a few other games we love in my classroom.
QR code sight word hunts
Sight word bump
Sight word bowling
Letter necklaces
Spin a sight word
Where's the bear
King's crown
Starry sight words
Sight Word Candy Land
Sight Word Jenga
There are many fun ideas for sight words! The possibilities are endless.
These phonics lessons and sight word lessons are NOT a part of daily five. They're the mini-lessons in between each daily five round/guided reading group.
Just spend a small focused time on these lessons each day and then let students practice independently in daily five, during transitions, and even when waiting in line to go places. The joy of learning never stops!
I hope this post encouraged you to know that you can love teaching writing and your students will love learning how to write!